How to Create an Email Address

How to Create an Email Address:

  1. Log in to cPanel. See how: https://secure.likuid.com/knowledgebase.php?action=displayarticle&id=143

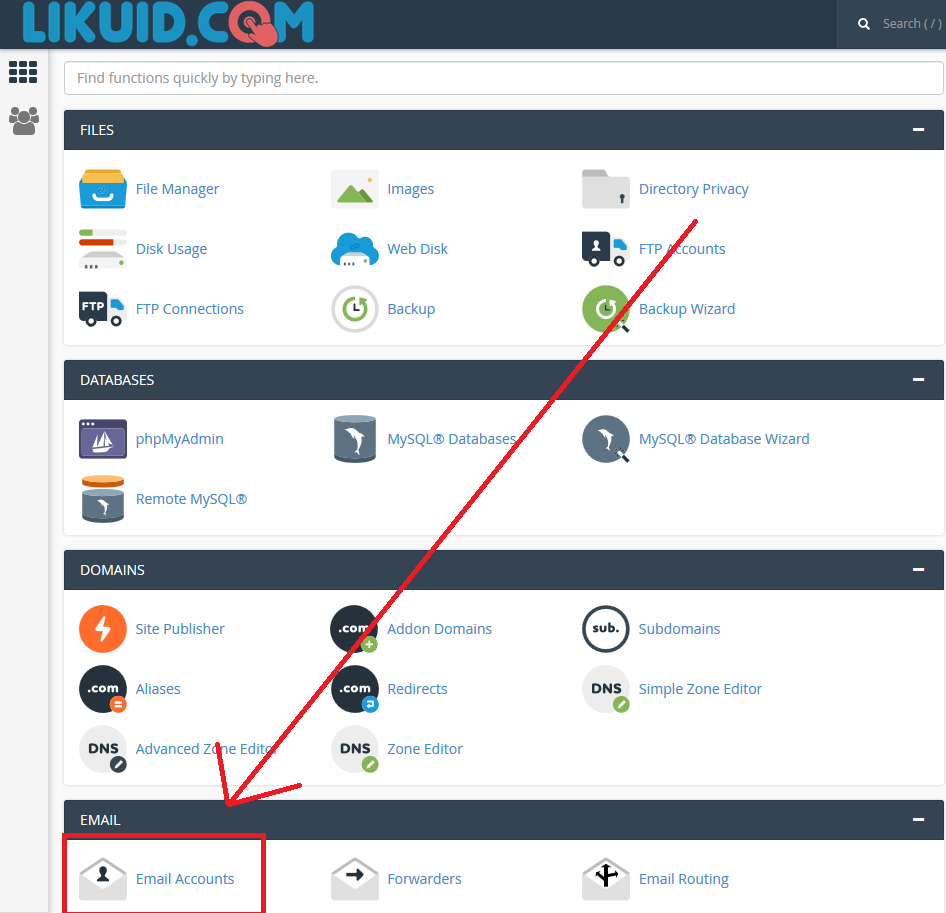
  2. In cPanel, click on “Email Accounts”.

    Email Accounts in cPanel

  3. Enter the email address name, a complex password, and click on “Create Account”.

    Create Email Account

  4. Your email address is now created.

    Email Creation Success

  5. To configure the email address, you can follow the link below:

    Configure Email Address

    OR

    Configure Email Address on MacOSX

Steps to configure an email address in the Thunderbird application:

1- Click on “Set up an account: Email”.


2- Enter the account name followed by the email address to be configured and the password.


3- Click on “Manual config” to configure the remaining settings:


4- The incoming IMAP port should be 993 with SSL/TLS encryption and authentication left on Autodetect.

The outgoing SMTP port should be 465 with SSL/TLS encryption and authentication left on Autodetect.

Choose the hostname as “mail.yourdomain.extension”.

The username in both cases should be the email address in question.

How to Configure an Email Account in Outlook 2010-2016

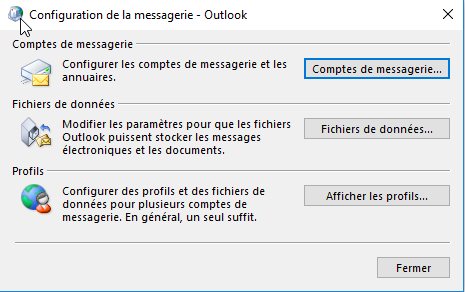
1- From your Windows PC, search for “Control Panel” in the bottom left corner and click on “Control Panel”.

2- Open the mail option using the search bar in the Control Panel:

Open the Control Panel.


3- Open the mail option.

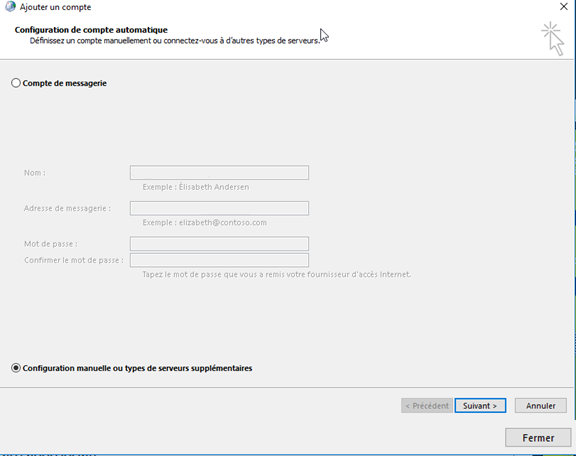
4- Select “Manual setup or additional server types”.


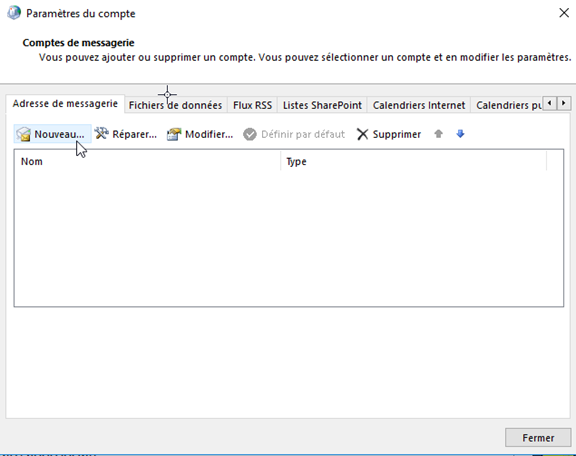
5- Click on “New”.

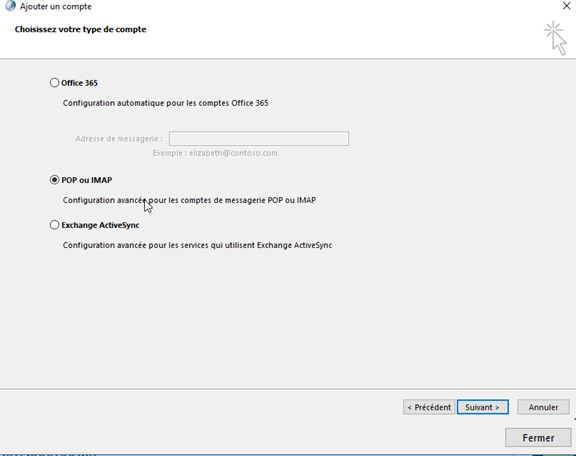
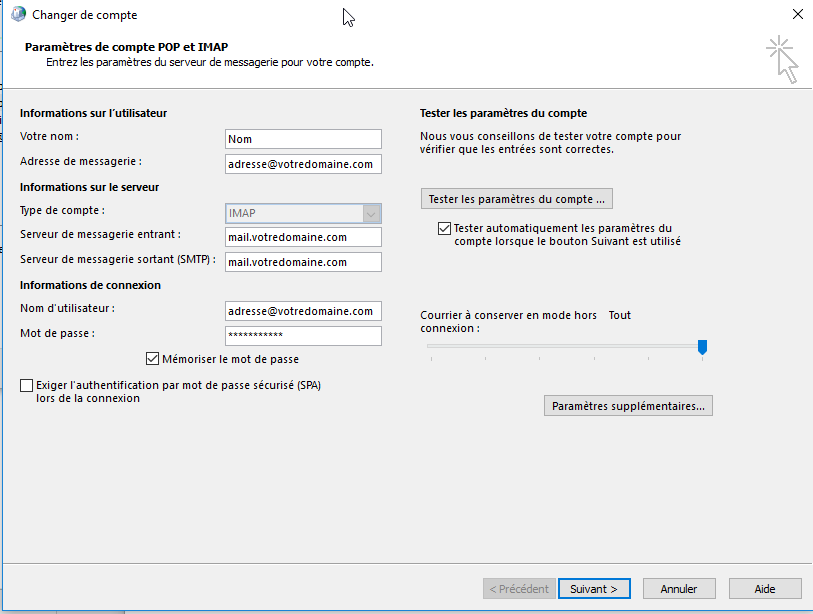
6- Configure the account as shown in the following example:
– Enter your name, email address, and password.

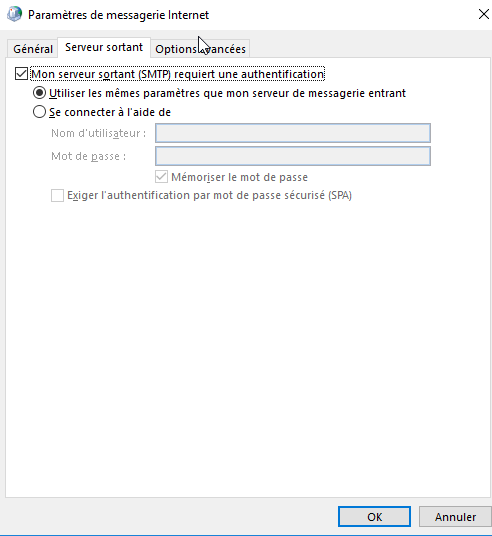
7- Check the option “My outgoing server (SMTP) requires authentication”.

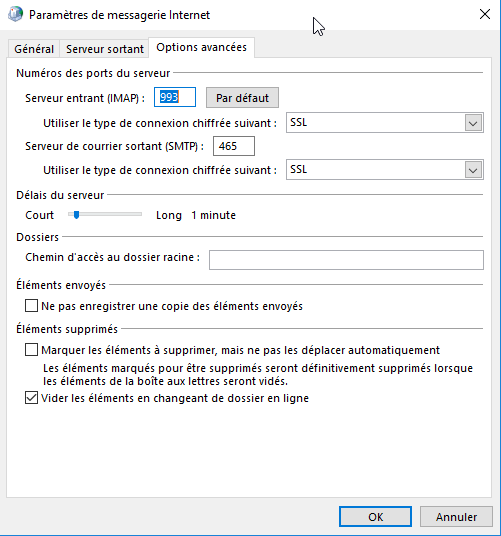
8- Apply the following settings:

  • Incoming server (IMAP): Port 993 with SSL/TLS encryption.
  • Outgoing server (SMTP): Port 465 with SSL/TLS encryption.
  • Incoming and outgoing server: “mail.yourdomain.extension”.
  • Username: The full email address in both incoming and outgoing server settings.

Configuration with the Outlook App

1 – Go to the “Play Store”, “App Store”, or “Google Store”.


2 – Search for the “Outlook” app.


3 – Install the “Outlook” app.


4 – Open the “Outlook” app.


5 – Ouvrir l’application “Outlook”.


6 – Entrer votre adresse courriel et cliquer sur entrer. 


7- Click on “Setup Account Manually”.


8 – Choose the “IMAP” option.


9. Configure the account as shown in the following screenshot.

How to Configure an Email Account:

  1. On the homepage, click on Settings.

    Settings

  2. In Settings, click on Mail.

    Mail Settings

  3. Click on Add Account.

    Add Account

  4. Click on Other.

    Other

  5. Click on Add Mail Account.

    Add Mail Account

  6. On this page, you need to enter your email account credentials.

    • Name: A name of your choice.
    • Address: Your email account (info@yourdomain.com).
    • Password: The password for the email account (the Address account).
    • Description: Personal description.

    Email Account Credentials

  7. On this page, you need to enter the credentials to connect to the server.

    • Incoming Mail Server and Outgoing Mail Server:
    • Host Name: mail.yourdomain.com (or alternatively, mail.yourdomain.ca, mail.yourdomain.info, etc.)
    • Simply put “mail.” in front of your domain name and its extension.
    • For example, if your domain is “mastuvu.com”, you would enter mail.mastuvu.com. If your domain is mastuvu.ca, you would enter mail.mastuvu.ca, and so on.
    • Username: Your email address (e.g., info@mastuvu.ca).
    • Password: The password for the email account (e.g., the password for the account info@mastuvu.ca).

    Server Credentials

  8. Once the server information is entered, make sure you have selected IMAP and then click on Next.

    Select IMAP

  9. Click on Save.

    Save

  10. Your email account is now available on your Mail app.

    Email Account Available

If your email account still doesn’t work, please follow these steps:

  1. On the homepage, click on Settings.

    Settings

  2. In Settings, click on Mail.

    Mail Settings

  3. Click on Accounts.

    Accounts

  4. Select your email account.

    Select Email Account

  5. Click on your email account again.

    Email Account Details

  6. First, we will check the SMTP outgoing server information. Click on SMTP.

    SMTP Settings

  7. Then, click on the primary server for your domain.

    Primary Server

  8. For this step, make sure your Host Name, Username, and Password are correctly entered (Do not leave anything optional).

    Then, uncheck SSL and set the port to 587.

    SMTP Configuration

  9. Click OK.

    OK

  10. Return to the account page and now click on Advanced.

    Advanced Settings

  11. Make sure the SSL option is checked and the port is set to 993.

    Advanced Configuration

If your account is still blocked, it is possible that your IP address is blocked in our firewall.

Visit monip.likuid.com and provide us with your domain name and IP address via our support system.

By ticket: https://secure.likuid.com/submitticket.php?step=2&deptid=2

You can also reach us via chat or contact us by phone.
https://secure.likuid.com/contact.php