
This tutorial assumes you have already created your email address in your cPanel control panel.
See “Create an Email in cPanel” for details.
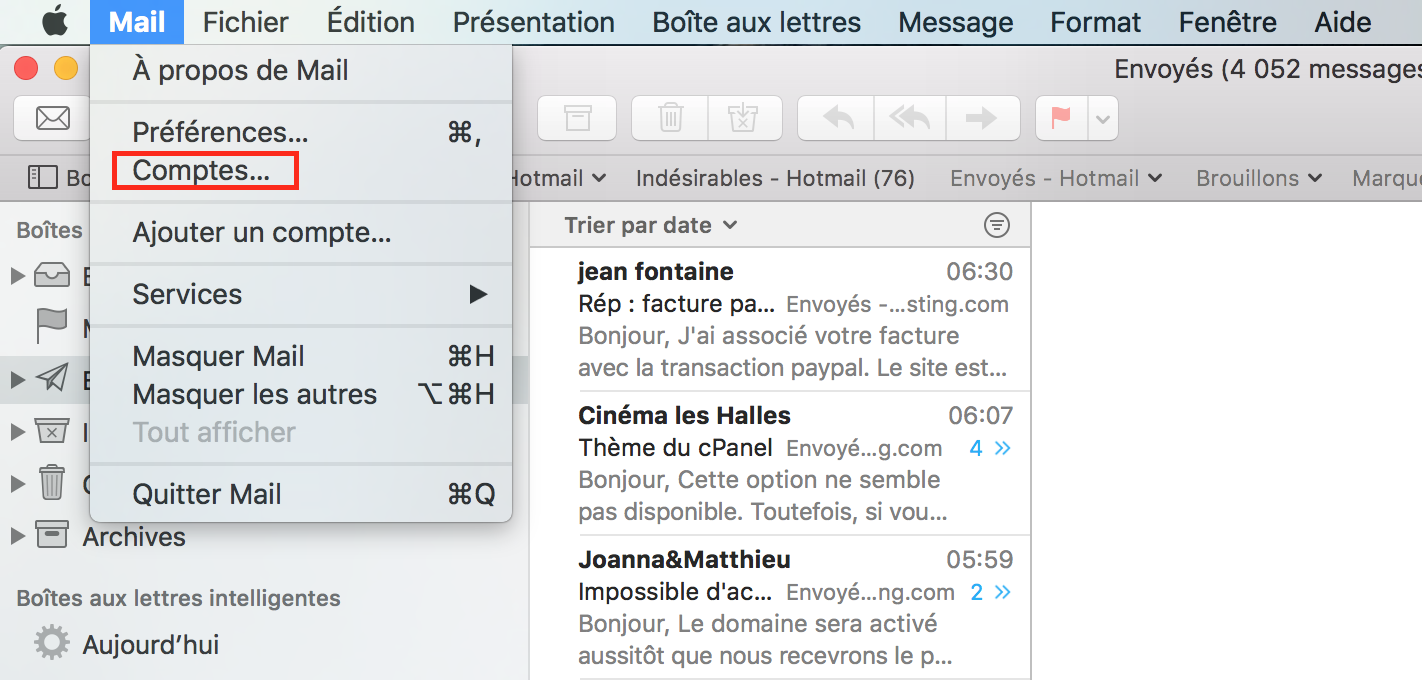
1- Open Mail App:
- Click on Mail, then go to Accounts….
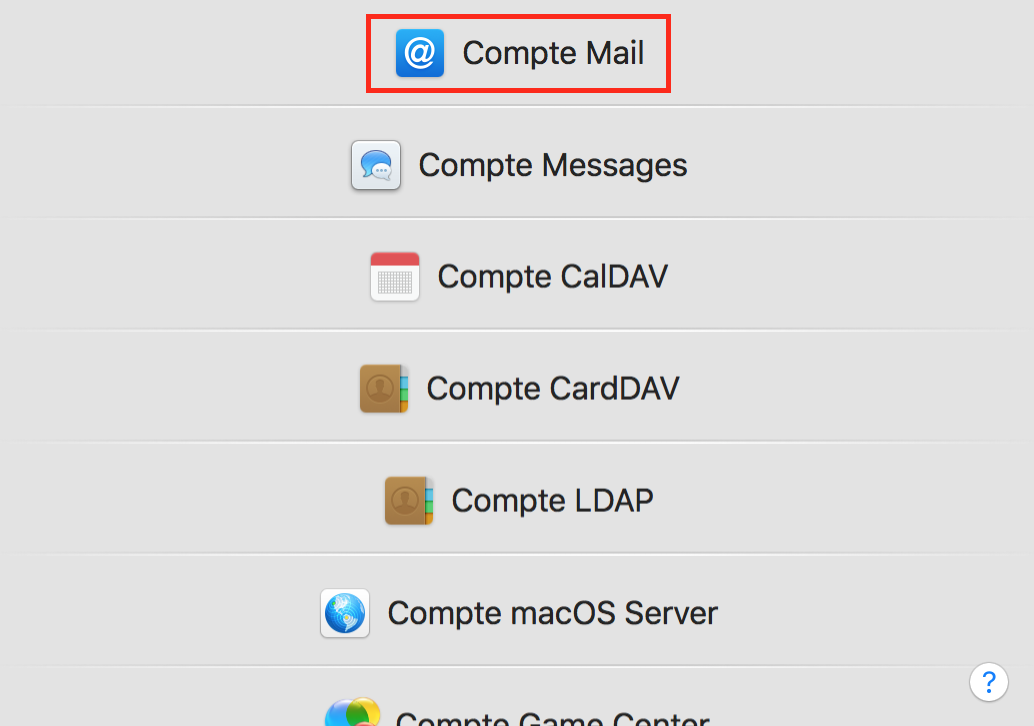
2- Add Account:
- Click on Add Other Account….

3- Choose Account Type:
- Select Mail account.
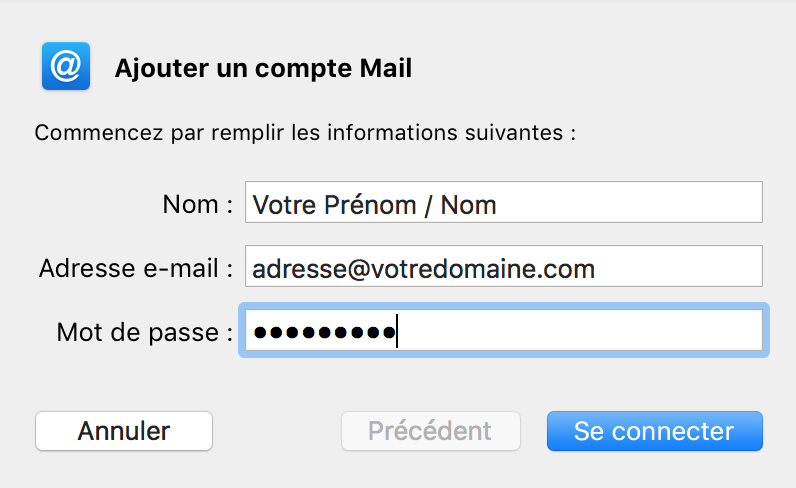
4- Enter Account Information:
- Enter the name you want to appear when you send emails, your full email address, and your password.
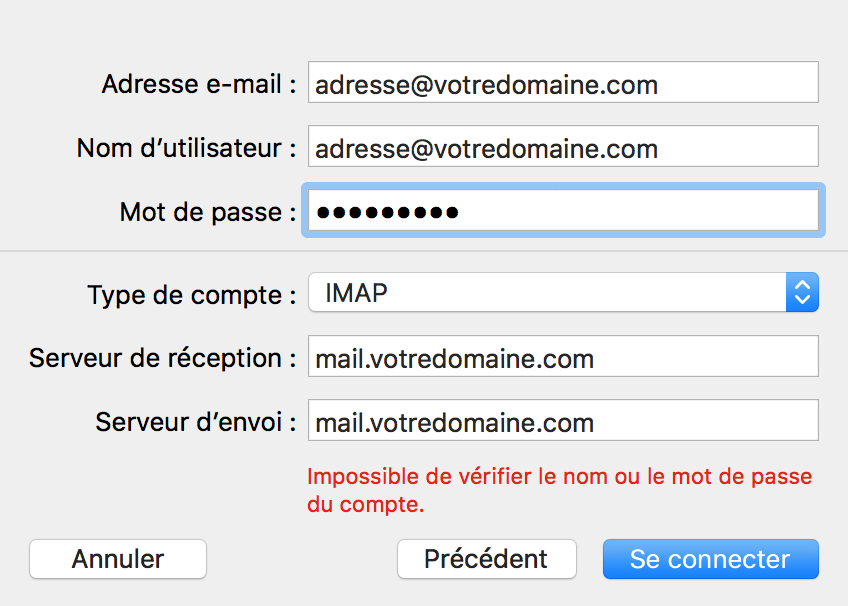
5- Server Information:
- Enter your username (your full email address), the incoming server (mail.yourdomain.com), and the outgoing server (mail.yourdomain.com). Note that mail.yourdomain.com will be replaced by your actual domain.
6- Account Description:
- You can choose a description for your account in the application and decide to sync mail and notes.

7- Verify Settings:
- Normally, these settings should work, and your email should be functional.

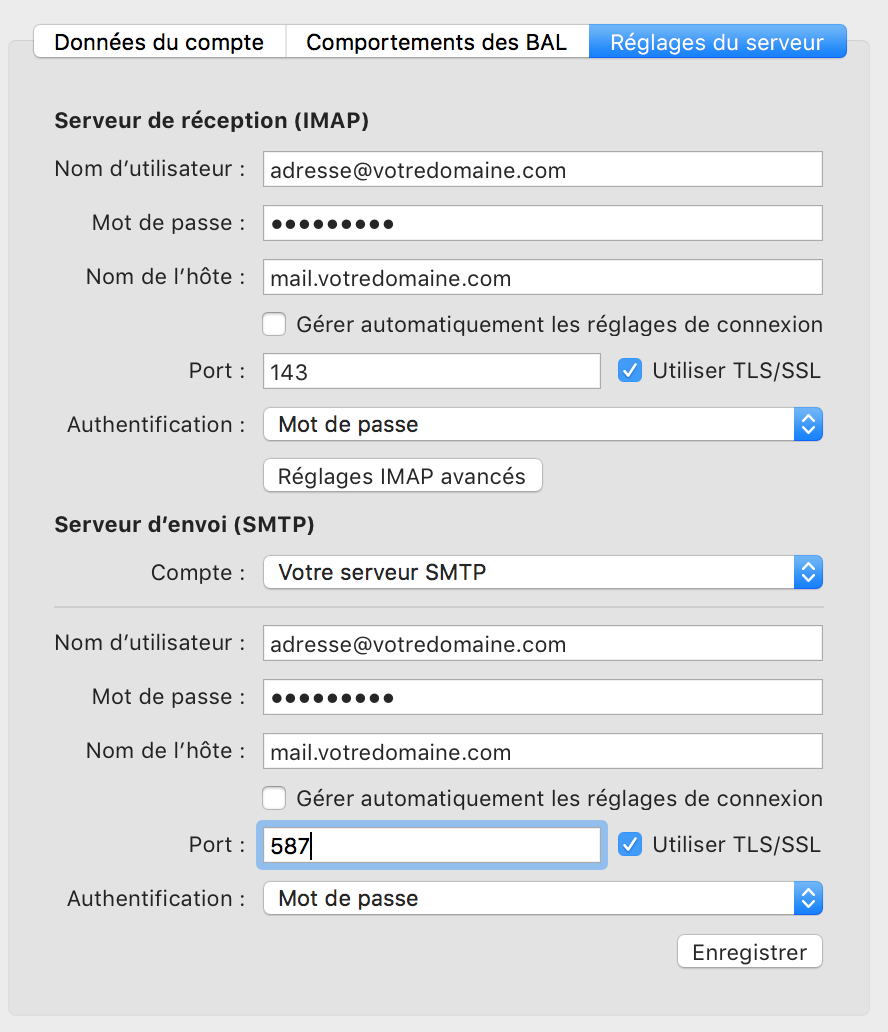
8- Troubleshooting:
- If you encounter a problem, uncheck the box “Automatically manage connection settings” and ensure you have the following settings:
- Incoming Server (IMAP): Port 993 with SSL/TLS encryption.
- Outgoing Server (SMTP): Port 465 with SSL/TLS encryption.
- Username: The full email address for both incoming and outgoing servers.
9- And that’s it! You can now send and receive your emails.